Posted on

The Good, The OK, and Ugly of Grinding Coffee


Getting the best coffee grind for your morning brew is easy when you know your options. Here is a really fast breakdown of how to get the best coffee grind for your coffee maker.

The Ugly — Using a Blade Grinder

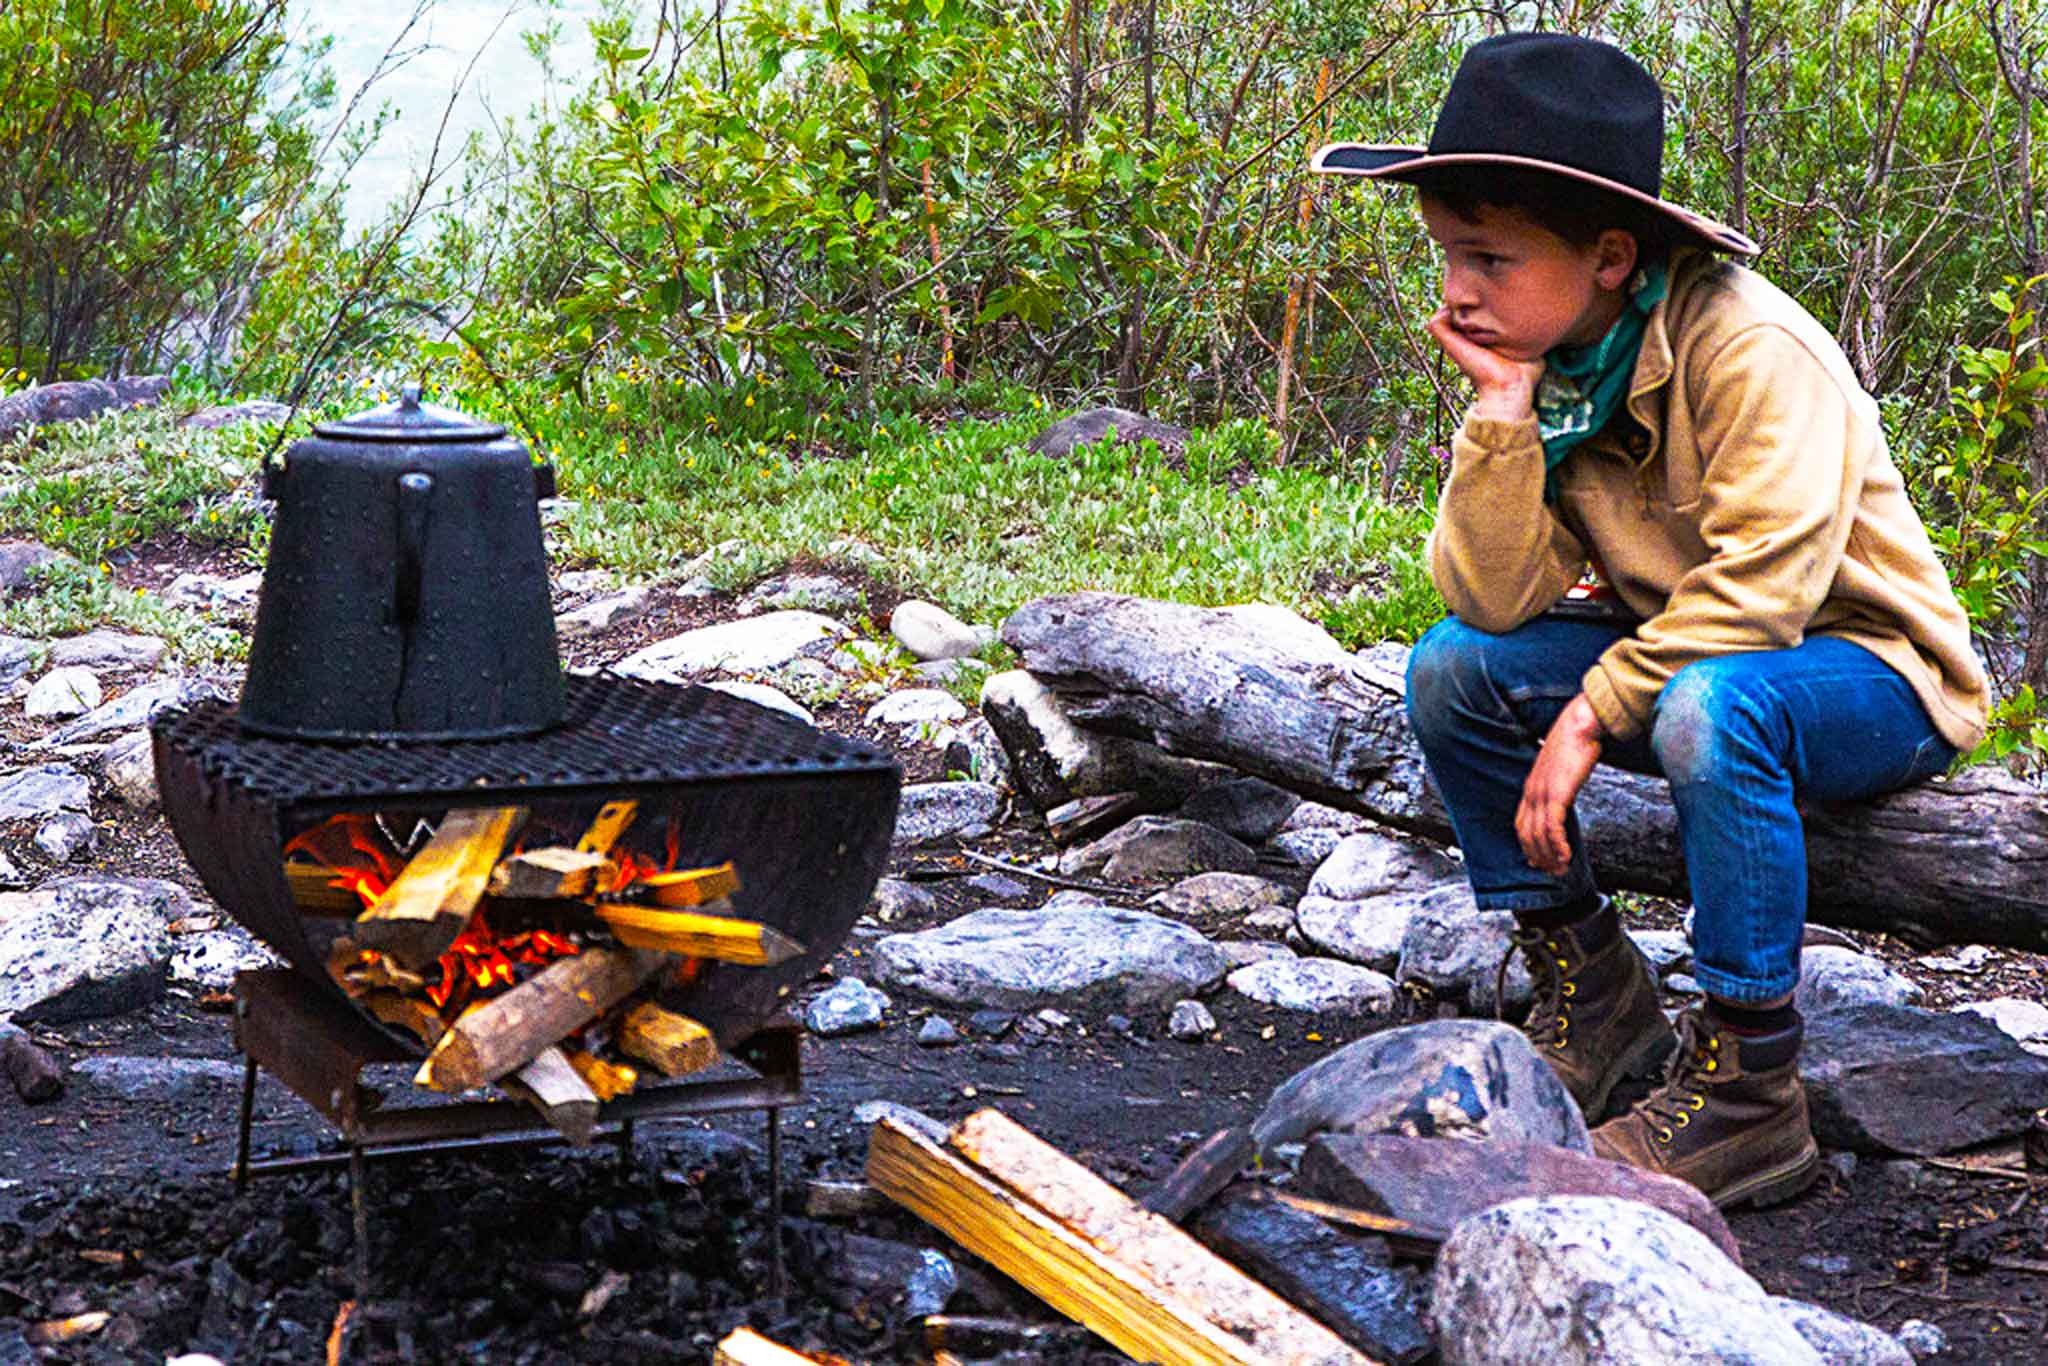
This may be the worst grinding option, but it sure beats the way cowboys used to do it — with the butt of their gun!

Why it’s the worst.


The reason a blade grinder is just about the worst option is because of how it works. The blade grinder has one or two blades that spin very fast — essentially chopping the beans. This “chopping” of the beans creates an uneven grind. Then during brewing your ground will not extract properly. It’s kind of like trying to brew espresso with french press coarse grinds and at the same time mixing that brew with a french press using espresso grind. It’s going to be messy and it won’t taste right.

If you’re a glutton for punishment.

If you’re going to use the blade grinder anyway here’s some tips.
To get the best coffee grind from a Blade grinder make sure to keep the grinder upright on the counter.
A common mistake is made in twisting and turn the grinder to “assist” in the grinding process. This actually makes the chopping of the beans by the grinder worse. Just make sure the grinder is level.

Follow our handy time-limit for grinding by brew method

  • 20 seconds (finest) – Turkish
  • 16 seconds – Fine Espresso
  • 14 seconds – Standard Espresso
  • 12 seconds – Cone Filter Drip
  • 11 seconds (middle grind) – Universal Drip
  • 10 seconds – Flat/Basket Filter Drip
  • 9 seconds – Percolator
  • 8 seconds – Stovetop Percolator
  • 6 seconds (coarsest) – French Press

The OK — Letting the pros do it for you.

A better option is to let the pros grind your coffee for you. Here at Camano Island Coffee Roasters we give all of our Club members the option to have their coffee ground by the experts. Just let us know how you plan to brew your coffee and we will give you the best coffee grind possible.

Why it’s only ok.

As soon as we grind your beans, they start to lose some of the amazing fresh taste. The beans in whole form hold in the oils and flavors better enabling your coffee to last longer. Receiving the beans in whole bean and grinding them correctly yourself will give you the best flavor possible! But if convenience is more important to you, then leaving the mess of grinding to us!


The Best Coffee Grind Option: Grinding with a Burr Grinder.

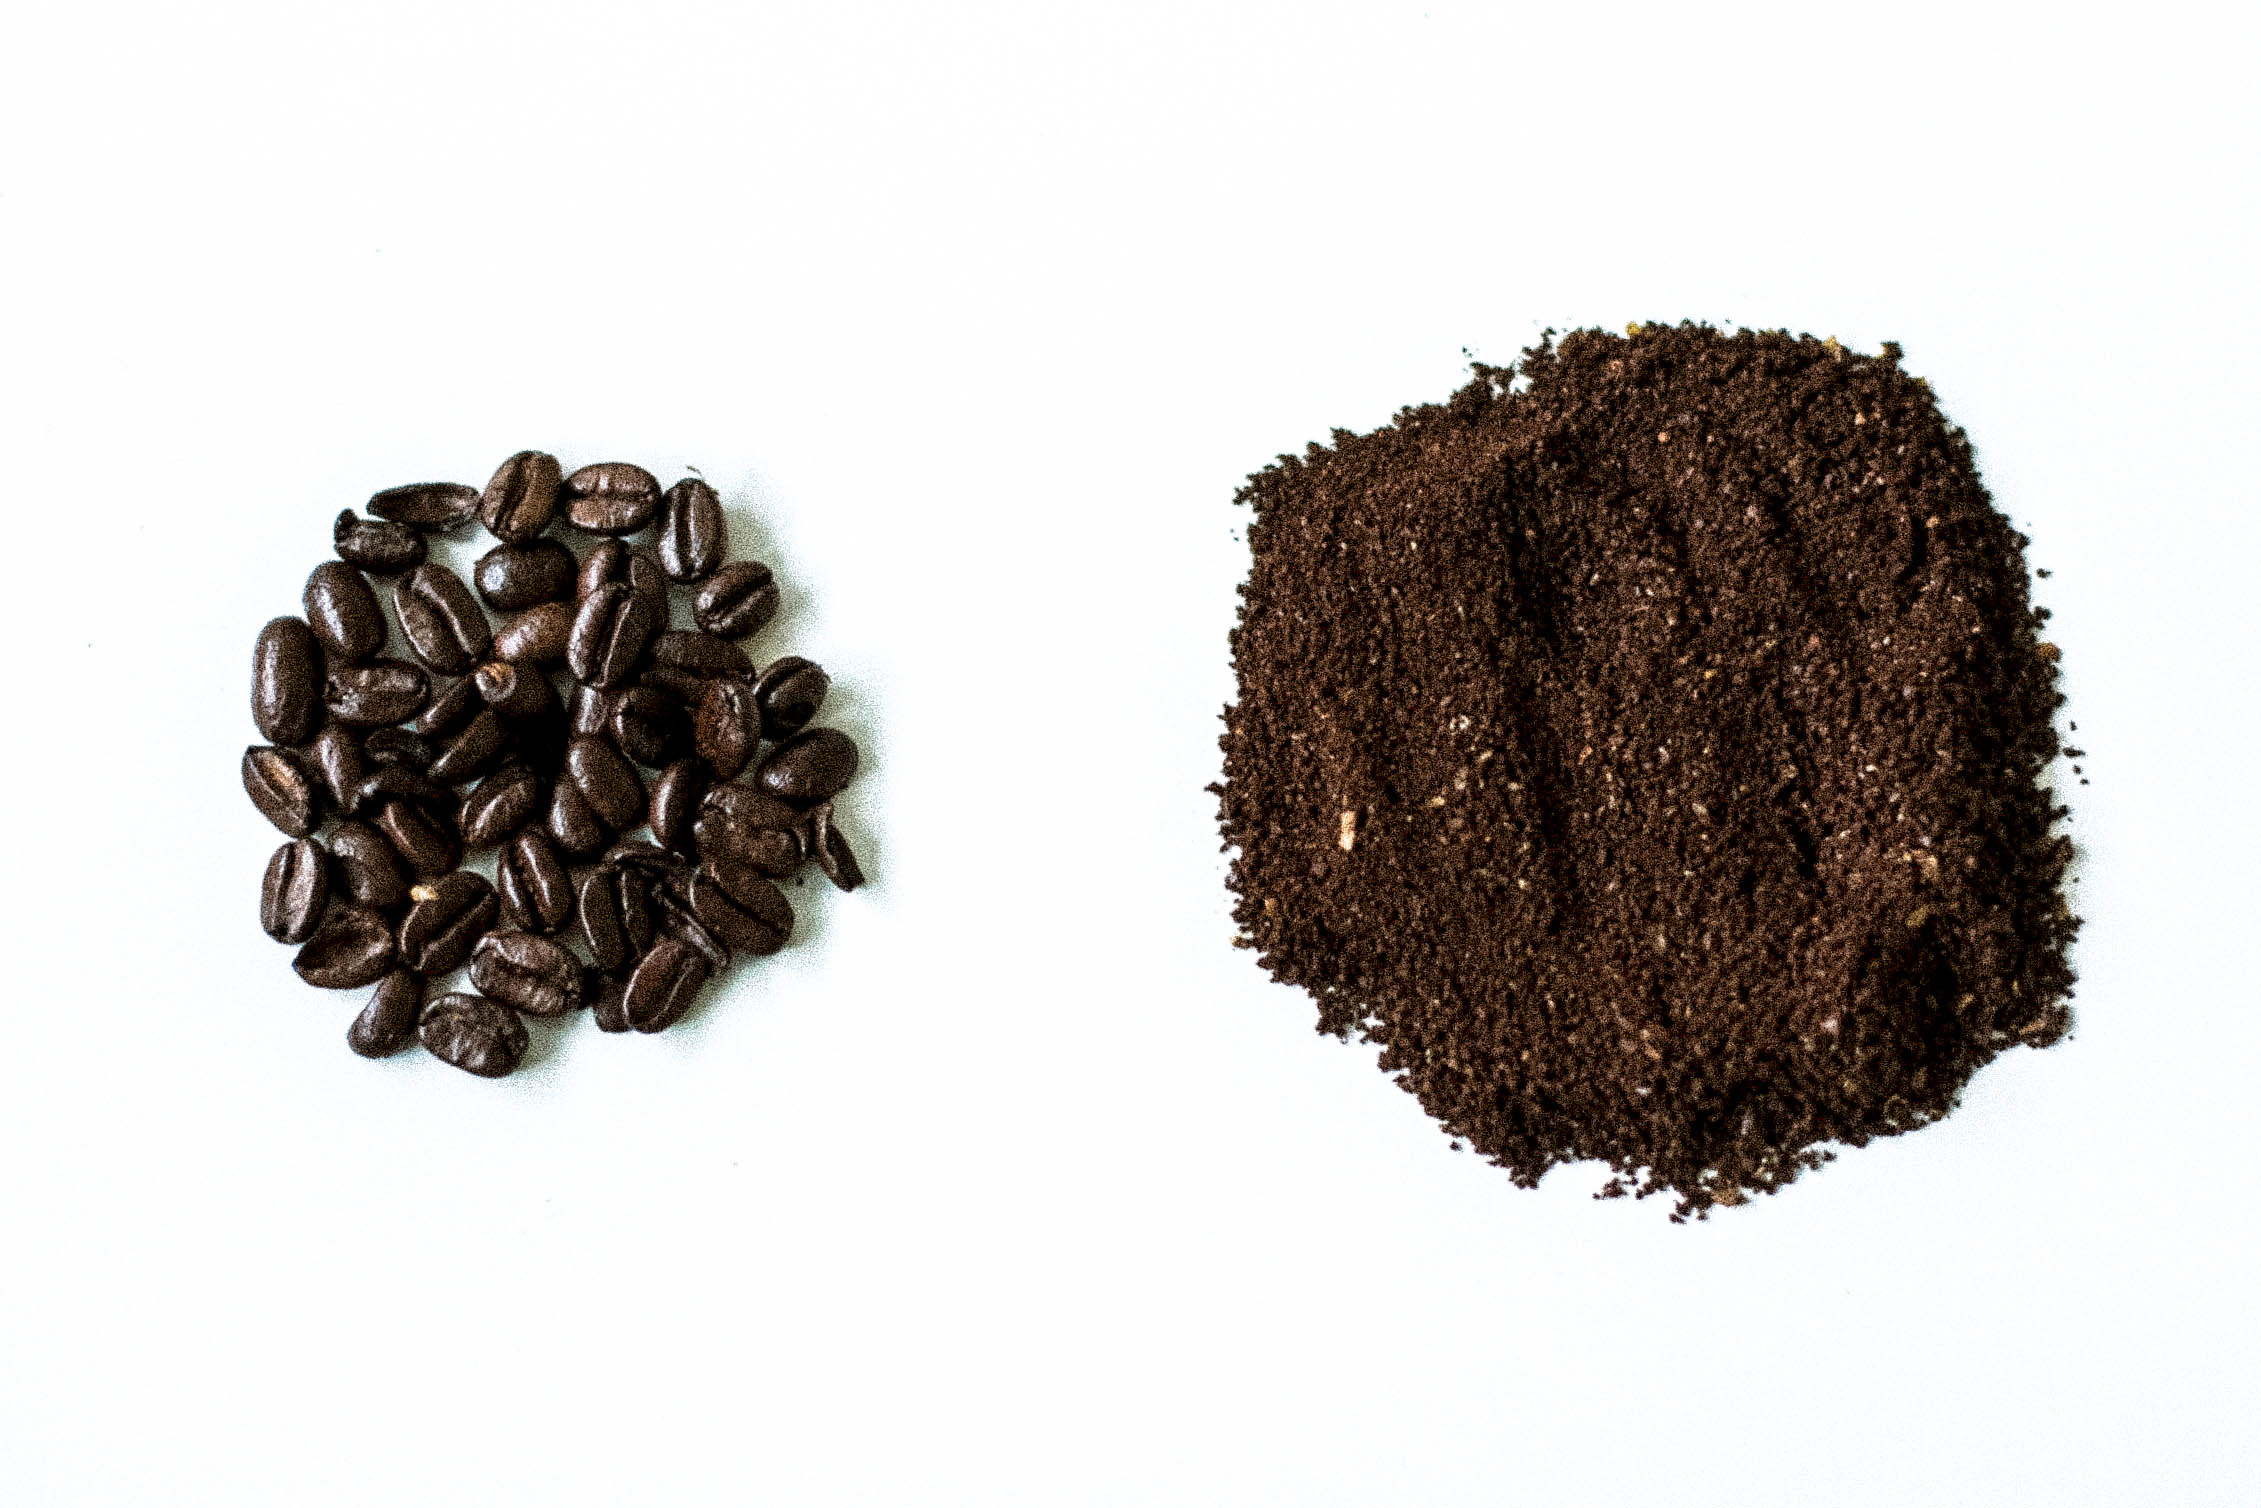
The very best coffee grind option is to grind your beans yourself with a burr grinder. A burr grinder contains two discs that essentially grind against each other. It’s this motion of crushing and grinding that enables you to receive the most uniform grind possible.

Why it’s the absolute best coffee grind.


Your beans will be fresher, better tasting, and more versatile. Your beans will hold in their flavor for the longest possible time if they are stored whole. You will also get the best flavor extraction with a consistent and accurate coarseness for your grounds. Remember it’s the uneven grinding of a burr grinder that will mess up your flavor. Lastly, when you receive your beans as whole and grind them yourself with a burr grinder then you can choose different brewing methods with the same bag of beans. Want the strong, thick flavor of a french press in the morning? Want a more nuanced, smoother mouthfeel of a pourover in the afternoon? You can do both if you use a Burr grinder.
Below is a list of the standard grind settings by brew method — from finest to coarsest.

  1. Turkish
  2. Fine Espresso
  3. Standard Espresso
  4. Cone Filter Drip
  5. Universal Drip
  6. Flat/Basket Filter Drip
  7. Percolator
  8. Stovetop Percolator
  9. (coarsest) – French Press

You’ll notice that Turkish and then espresso is the most fine grind and the french press is the most coarse. Each brewing method requires a specific coarseness.

Here’s an example of Turkish grind.


And here’s an example of French Press


Now that you’ve seen The Good, The OK, and The Ugly of Coffee Grinding why don’t you tell us what *ahem* how you grind your beans. Comment below!

**BONUS**


See more photos of a coffee grinder rifle from the Civil War


Posted on

3 Ways Coffee Prevents Diabetes

Type 2 Diabetes is a scary disease that is becoming more and more prevalent in the U.S.

Diet and exercise are an important part of lowering your risk, but recent research suggests coffee prevents diabetes. Check out the 3 ways coffee prevents diabetes below.

1. Coffee Prevents Diabetes By Reducing Glucose and Insulin Levels

Lots of studies and statistics show that Type 2 Diabetes is on the rise. Unfortunately this can lead to two to four times the risk to develop cardiovascular disease.1 Diet and exercise are an important part of lowering your risk, but drinking coffee can also be a big prevention tool, too.

A study published in Archives of Internal Medicine found, “Drinking 3-4 cups of coffee per day was associated with an approximate 25% lower risk of developing type 2 diabetes compared to consuming none or less than 2 cups per day.”2

What is it about coffee that reduces your risk for diabetes? What you might not know is coffee is actually a great source of antioxidants — chlorogenic acid, and trigonelline to name a couple. These antioxidants work together to regulate your glucose and insulin levels which in turn helps to prevent the onset of type 2 diabetes.

Another study from 2002 found that coffee drinkers consuming at least 7 cups of coffee per day were half as likely to develop type 2 diabetes.3 The interesting thing about this study is when you compare it against recommended levels of caffeine consumption this is far higher than what is recommended to prevent overcaffeination. One way to have your coffee and drink it too so to speak is to only drink arabica, shade-grown coffee. Arabica beans contain half the caffeine content of other coffees. This enables you to drink more coffee without getting the jitters of overcaffeination. While shade grown coffee contains less acidity, because it grows slower. This slow-grow process develops a smoother more flavorful cup without bitterness.

2. Coffee Prevents Diabetes By Reducing Oxidative stress and Increasing Cell signaling

Another cause of type 2 diabetes is oxidative stress — something the antioxidants in coffee reduce.4

But, what exactly is oxidative stress? Oxidative stress causes issues with how your cells respond to insulin. It’s this incorrect response to insulin that creates an environment where Type 2 diabetes is more likely to develop.5 Antioxidants in coffee prevents diabetes by preventing one of the main mechanisms of type 2 diabetes — oxidative stress.

3. Coffee Prevents Diabetes By Increasing Liver Function

Your liver function is directly related to your risk of diabetes. How? Well, a good, healthy liver should be regulating the glucose in your bloodstream. Some studies are showing coffee may help your liver function and therefore your glucose management.

“Harvard researchers found improvements in adipocyte and liver function as indicated by changes in adiponectin and fetuin-A concentrations when drinking 5 or more cups of coffee per day.”6

A healthy liver is something you want to have for a wide array of medical reasons, but since it also reduces risk of Type 2 Diabetes, why wouldn’t you make sure and take good care of it?

There are many choices in lifestyle and diet that you can make to reduce your risk of diabetes. But coffee is tasty, easy and an excellent addition to any prevention measures you are already using. Coffee prevents diabetes and it tastes delicious so make sure to drink the best coffee you can. That’s why her at Camano Island Coffee Roasters we only roast USDA Certified Organic coffee beans and ship within 48 hours to give you the freshest taste possible.

1.http://www.heart.org/HEARTORG/Conditions/More/Diabetes/WhyDiabetesMatters/Cardiovascular-Disease-Diabetes_UCM_313865_Article.jsp#.WIvdWrYrJTY

2.Crippa A. et al. (2014) Coffee consumption and mortality from all causes, cardiovascular disease, and cancer: a dose-response meta-analysis. Am J Epidemiol. 180(8):763-75(Found in coffeeandhealth.org)

3.van Dijk A.E. et al. (2009) Acute effects of decaffeinated coffee and the major coffee components chlorogenic acid and trigonelline on glucose tolerance. Diabetes Care, 32:1023-1025.(As found in coffeeandhealth.org)

4. http://coffeeandhealth.org/topic-overview/potential-mechanisms-3/

5 Koloverou E. et al. (2015) The evaluation of inflammatory and oxidative stress biomarkers on coffee-diabetes association: results from the 10 year follow up of the ATTICA Study (2002-2012). EJCN, 69(11):1220-1225(as cited in http://coffeeandhealth.org/topic-overview/potential-mechanisms-3/)

6. N M Wedick et al, 2011. Effects of caffeinated and decaffeinated coffee on biological risk factors for type 2 diabetes: a randomized controlled trial. Nutrition Journal, 2011, Volume 10, published online ahead of print. (As found in coffeeandhealth.org)

Posted on

Brew Guide: Steaming Milk

The art of steaming milk is tricky, but worth the dedication required to learn. Keep a close eye on all the small details, and with practice you can become a true pro.
Steaming milk can be pretty difficult, and takes around 4 minutes.

WHAT YOU NEED

Milk

Espresso Machine with Steamwand

Pitcher

Cloth

POUR MILK


To start, pour milk into your pitcher till it’s about half full. You will need the extra room to properly steam your milk and achieve fantastic foam.

Milk

STEAMING YOUR MILK


Before starting the steaming process, be sure to give a quick pull on the handle to bleed the steam wand. This removes any water from the wand. Once you’’ve done this, submerge the wand in the milk and begin to steam. Slowly lower the pitcher so just the tip is submerged. Small microfoam will begin to form and the milk will expand. Do this slowly so that no large bubbles are created. The milk should swirl like a whirlpool and incorporate the microfoam into the pitcher of milk. Slowly continue to draw the pitcher down until you have your desired amount of foam. Now you can move the wand completely under the surface of the milk (but not touching the bottom of the pitcher) and hold steady.

ACHIEVING OPTIMUM TEMPERATURE


We recommend the use of a thermometer to make sure your milk is the perfect temperature of 160 degrees. To achieve this optimum temperature steam your milk until your thermometer reaches 150 degrees, then shut off the steamwand. The milk will continue to heat a few more degrees once you shut off the steam, hitting the desired temperature of 160 degrees.

Milk

FINISH


Remove the pitcher from the wand, bleed the steamer once more, and wipe clean with a damp towel. This clears away any milk residue that may be left behind, so your machine will always steam properly and stay completely clean inside.

Milk

REMOVE AIR BUBBLES


Finally, tap the pitcher once or twice on the counter, to remove any air bubbles in the foam. Give it a quick swirl, and observe the texture of the milk. If it looks like wet paint – you’ve done a marvelous job.

ENJOY


Now that you’’ve steamed milk, you can pull a few shots of Espresso LINK and make yourself a latte. Enjoy.

Milk
Posted on

Brew Guide: Espresso

Espresso was invented as a way to make coffee expressly, as people were in a hurry and didn’t have time to wait 10 minutes to brew their morning pot of coffee. However, over the years, espresso has become more about the taste than the speed. The rich, strong flavor is something that coffee drinkers around the world look forward to every morning.

Espresso is quite tricky, and can be done in around 4 minutes.

WHAT YOU NEED:

Coffee
Espresso Machine
Portafilter
Cloth

Espresso

GROUNDS

Grind your coffee on a fine grind – #1 on an industrial grinder. For a double shot, you’ll want 15 grams of coffee, which is equal to a smidge less than 2 tablespoons.

Espresso
Espresso

ADDING GROUNDS

Put the grounds into the portafilter so it forms a little mound on the top. Grab your tamper and press down firmly. Remove the tamper and use the handle to give the side of the filter a quick tap to remove excess grounds, then press again. Give it a quick twist before you remove it so the top is nice and smooth.

Espresso
Espresso
Espresso

PULLING SHOTS

Insert the portafilter into the machine, making sure that it’s fully locked into its proper position. Place shot glasses or a mug below to catch the shot. Press the button and watch as the shot begins to pour. The best shots take anywhere between 25-33 seconds from pushing the button to finish.

Espresso

ADDED TIPS

If your shots are running too slow, try easing up on the tamping pressure. If they are too long, try tamping harder. If this doesn’t solve your problem, try adding slightly less grounds to the portafilter for a faster pour and adding slightly more for a longer pour.

MACHINE CARE

Once you’ve pulled your shot, make sure you properly care for your machine and equipment. Carefully take the portafilter out, remove the used grounds, and give it a quick wipe down with a towel. You should also quickly run some water through the group head on your machine to rinse away any grounds that are stuck in the screen. Place the filter back into the machine for storage, and give your shot glasses a quick rinse.

Espresso

ENJOY

Whether you made a latte, americano, or some other fabulous espresso drink, enjoy sipping the Buzzbox Coffee – you’ve earned it.

Posted on

Brew Guide: Pour-Over

Over the past few centuries, many different inventors and coffee companies have developed their own unique method to Pour-Over coffee. By changing the size of the hole and the pattern of the interior ridges, companies have developed different pour-over models that all produce their own unique cup of coffee. For this brew, we used a German “Cilio” Pour-Over with a size #4 filter.

Pour-Over is extremely easy, and should only take about 10 minutes.

WHAT YOU NEED

Pour-Over
Filter
Coffee
Water
Wooden Stirrer
Gooseneck Kettle
Grinder

AMOUNTS

3 tbsp coffee & 12 oz water
4 tbsp coffee & 16 oz water
5 tbsp coffee & 20 oz water
6 tbsp coffee & 24 oz water

24 grams coffee & 355 grams water
32 grams coffee & 473 grams water
40 grams coffee & 591 grams water
48 grams coffee & 709 grams water


 Pourover

GROUNDS

To start out, measure out your Buzzbox Coffee and set your grinder to a medium-fine grind. Also, that’s #5 or autodrip on an industrial grinder


Kettle

WATER

Bring your water to a boil and then remove from heat. Never pour boiling water straight onto coffee grounds – it will scorch them and give your coffee a burnt flavor. Allow the water to cool for 30 seconds (the temperature should be between 195-205 degrees) before you proceed to the next step.


Pour-over

Pour-over Pour-over

FILTER

Place your filter inside your pour-over, set it on top of your mug, and use hot water to give it a quick rinse. This gets rid of any papery taste the filter might add to the coffee, and warms your mug up, too. Dump out the excess water.


Pour-over

ADDING GROUNDS

Drop the grounds into the filter and give it a small shake so they are distributed evenly.


Pour-over

POURING

Grab your kettle and begin pouring the water in a slow, circular motion outward from the center. Only pour until the grounds are slightly covered with water, then stop.


Pour-over

BLOOM

Let the grounds bloom for 45 seconds, then use a small wooden paddle or chopstick to give the grounds a quick stir. By stirring the grounds you are ensuring they are evenly covered with water, which helps create an even extraction.


Pour-over

2ND POURING

Continue to pour water in the same circular motion over your coffee until you’ve used all of your water. Remove pour-over once the drip has slowed to a near stop.


 Pour-over

ENJOY

You can now enjoy your fresh cup of Pour-Over coffee.

Posted on

Brew Guide: Turkish

Coffee is a huge part of Turkish culture. In fact, traditional houses include special “coffee rooms” specifically for brewing and drinking coffee. In the 17th century, the Turks were spending more time drinking coffee then going to the mosques to pray, so the government made coffee illegal. This, however, didn’t stop the Turks from drinking coffee, and to this day it remains a rich part of their culture today.

This brew is difficult, but only takes about 7 minutes.

WHAT YOU NEED

Coffee
Ibrik
Sugar (Optional)
Grinder or Turkish Grinder
Water

Turkish

TOOLS

The ibrik comes in many sizes. A finished cup of turkish is considered 3oz, so the amount of water you use depends on the size of your ibrik and the number of cups you’re serving. You should never fill the ibrik past the neck. Technically, ? cup is a tad bit more than 3oz, but we’re using that measurement just to keep things simple.


Beans

GROUNDS

For every ? cup of water, you should use 1 tablespoon of turkish-ground coffee, which is extremely fine. The best way to get this fine of a grind is to purchase a turkish grinder, but you can also get a similar grind by putting your grinder on the finest setting possible. You’ll find most industrial machines have a turkish setting.


 TurkishTurkish

WATER/ADDING COFFEE

Put the water into your ibrik and place it on medium heat. Wait roughly 2 minutes, and then add the grounds into the ibrik. Do not stir the grounds.


Turkish

SUGAR

Some people prefer to add sugar into their brew. If you would like to do this, add sugar on top right after you add the coffee.  We recommend a teaspoon to start and you can adjust accordingly next time you brew based on your preferences. Again, do not stir.


 Turkish Turkish

BREWING

Once the coffee starts sinking and the sugar begins to dissolve, you can give the coffee a few quick stirs and turn down the heat just a bit. Your coffee will soon begin to bubble a bit on the surface. When you see small bubbles, make sure you turn down the heat even lower. Keep a close eye on your brew – don’t let it boil. A froth will start to rise to the surface. When it does this, remove from heat and let it settle. Once the froth has gone down, put it back on the heat and let it rise once more. Some prefer to let it rise and fall 3-4 times, but we recommend only twice.


Turkish

POURING

Take care when pouring your turkish coffee from the ibrik –  Give it a quick initial pour to get the foam, then slow down so most the coffee grounds will stay in the bottom of the vessel and not fall into your cup.


Turkish

ENJOY

Let it sit for a minute or two, so any grounds that might have slipped into your cup can settle at the bottom. Sit back and enjoy.

Posted on

Brew Guide: Woodneck

Woodneck brewing originated in Japan in the early 1900s. It’s unique flavor comes from the use of a cloth filter and the slow brewing process. We recommend the Woodneck to those who are truly dedicated to the craft of home brew – it requires patience and precision to get the bold, sweet cup it’s known for.

This brew is intermediate, and takes about 12 minutes.

WHAT YOU NEED

Coffee
Water
Woodneck
Cloth Filter
Gooseneck Kettle
Grinder

AMOUNTS

3 tbsp coffee & 8oz water
5 tbsp coffee & 13 oz water
24 grams coffee & 236 grams water
40 grams coffee & 385 grams water


 Woodneck

GROUNDS

You’ll want to grind your coffee on a medium grind – a #6 for those who have their coffee ground on an industrial machine.


 Woodneck

STARTING TIPS

If you have a new Woodneck cloth filter, make sure you remove the cloth filter from its frame and soak it in boiling water for 5 minutes before beginning to brew.


 Woodneck

WATER

Heat your water until it’s boiling and then remove it from the heat source. Woodneck brews best with an unusually low temperature of water – around 175 – 185 degrees. Let your water cool for about 1 minute before you begin the brewing process.


 Woodneck

FILTER

Place the filter onto the the wire frame, set it over the carafe and pour boiling water through the filter. The main purpose of this step is to warm your vessel prior to brewing to keep your coffee hotter for longer.


Woodneck

ADDING GROUNDS

Once you’ve dumped the water out of your woodneck, place the grounds into your filter. Give it a gentle nudge, so the grounds settle flat.


 Woodneck

POUR TO BLOOM

Begin pouring water in an very slow, circular pattern, starting at the edges and working your way towards the middle. When the water has barely covered the grounds, stop and let it bloom for 45 seconds.


 Woodneck

CONTINUE POURING

To continue the brew, pour half of the remaining water in the same slow circular fashion as before, and then wait for it to fully filter through. Finally, pour the last round of water very slowly until the filter is full and wait for your brew to finish.


 Woodneck

FINAL STEPS

Once it has all filtered through, you can set the filter aside. To properly care for your cloth filter, give it a thorough rinse and store it in a small dish of water in your fridge.


Woodneck

ENJOY

Now enjoy your strong, bold cup of Buzzbox Coffee.

Posted on

Brew Guide: Keurig

The Keurig is one of America’s new favorite ways to brew single-serve coffee. It’s fast and easy, but all those disposable K-cups can be harmful to the environment and your wallet.  How can you avoid these problems? By using a refillable filter like the Solofill, you can save money and save the environment.

Using a Keurig is really easy, and only takes about 5 minutes.

WHAT YOU NEED:

Keurig
Solofill
Water
Coffee
Grinder

AMOUNTS

1 tbsp coffee and 6 oz water
2 tbsp coffee and 8 oz water
8 grams coffee and 178 grams water
16 grams coffee and 236 grams water

For a 6 oz cup, scoop 1 tablespoon grounds into the filter.  For an 8 oz cup, use 2 tablespoons.

Keurig

 GROUNDS

First, you’ll want your coffee ground to a medium grind – a #6 on an industrial grinder. This is important, because a course grind will produce a weak coffee, but a fine grind will clog the machine.


  Keurig Keurig Keurig

FILTER

Use a spoon to scoop the grounds into the filter, and run your finger around the rim to clear any grounds. By removing the excess grounds, you are ensuring the lid seals properly and therefore preventing it from making a big mess – you don’t want to learn this the hard way!


Keurig

BREW

Once you’re ready, close the top of the lid and place your favorite coffee mug underneath the spout. Press the “Brew” button and in just a minute you can enjoy your fresh Buzzbox Coffee!


Keurig

FINAL STEPS

You might be tempted to try to brew twice using the same grounds, but don’t do it! The second round will taste like coffee-tinged water.  Simply let the used grounds cool a bit, dump them out, give the filter a quick rinse, and you’re ready to brew another cup.


Keurig

ENJOY

Sit back, relax, and enjoy the simplicity of the Keurig matched with the taste of your favorite Buzzbox Coffee.

Posted on

Brew Guide: Aeropress

Aerobie, the company that invented the Aeropress, is not a coffee company by origin. Their first product was actually the Aerobie Pro – A flying disk. Alan Adler, the founder of the company, had invented many disk-like toys before he invented the Aeropress. Today, Aeropress is Aerobie’s #1 product and an extremely popular method of one cup brewing. The Aeropress produces an espresso strength coffee and as a result, has become known as the “poor man’s espresso”.

Aeropress is an easy brew method and takes about 10 minutes to complete.

WHAT YOU NEED:

Aeropress
Tools Included
Water
Coffee
Circular Filter
Gooseneck Kettle
Grinder

AMOUNTS

1 scoop coffee – 12 oz water
16 grams coffee – 355 grams water


 AeroPress

GROUNDS

You’ll want one heaping Aeropress scoop of finely ground coffee to start – a #4 grind on industrial machines.


Kettle

WATER

Bring your water to a boil and then remove from heat. Never pour boiling water straight onto coffee grounds – it will scorch them and give your coffee a burnt flavor. Allow the water to cool for 30 seconds (the temperature should be between 195-205) before you proceed to the next step.


  AeroPress AeroPress AeroPress

FILTER

Place the paper filter into the plastic filter, screw it onto the Aeropress and set it over your mug. From here, you can wet the filter with your hot water, to remove the papery taste and heat your press and mug. Dump out the water before proceeding.


AeroPress

ADDING GROUNDS/BLOOM

Drop the grounds into the vessel, and add just enough water to cover them. Let them bloom for 30 seconds before continuing.


 AeroPress

POURING

After the bloom, pour more hot water into the Aeropress, until the water level is just above the blue number 3.


 AeroPress AeroPress

STIRRING AND PRESS

Use the paddle that comes with your press to give the grounds a stir for about 5 seconds, then place the plunger into the tube. From here, slowly press the coffee through the filter until you hear a hissing noise.


AeroPress

ENJOY

Add hot water for an americano, Steam milk for a latte, or drink it straight.

Posted on

Brew Guide: Moka Pot


Moka Pot was invented in 1933 when Italy’s economy wasn’t doing so swell. It was marketed as an affordable way to enjoy daily espresso at home, and thereby avoiding cafe prices. Today, many people still use the Moka Pot, and it’s known as one of the best ways to get “Stovetop Espresso”.

Moka pot is an easy brew, and should take roughly 15 minutes.

WHAT YOU NEED:

Moka Pot
Coffee
Kettle
Grinder

AMOUNTS

The amount of coffee you need depends on the size of your Moka Pot. You’ll want enough to fill the funnel filter of your pot without packing down the grounds.


Moka Pots come in all shapes and sizes, so measure how much water fills the bottom half of your pot before beginning.

Moka Pot

GROUNDS

Grind your beans on a medium grind, which is a #6 or Drip Flat on an industrial grinder.

Moka Pot

WATER

It’s not recommended that you boil your water directly in the Moka pot, because it might give it a metallic taste, so heat it in a separate kettle before beginning. Carefully pour the boiling water right into the bottom of the Moka Pot, filling it until the water line is even with the screw on the side.


  Moka Pot Moka Pot Moka PotMoka Pot

ASSEMBLY/ADDING GROUNDS

Put the grounds in the funnel filter, using your finger to even it out and remove excess coffee. Place the filter on the base, and screw the top half on. Caution: the base will be hot from the hot water, you might want to use a towel or hot mitt while you do this step.


Moka Pot Moka Pot

BEGIN BREW

Open the lid and set the Moka Pot onto your stovetop on a medium setting. To avoid burning your pot, don’t turn the burner any hotter than medium. Also be careful not to have the handle directly over the flame, as it could melt if it gets too hot.


Moka Pot Moka Pot 

CONTINUE BREWING

After a couple minutes, steam will start to push the water up through the grounds and into the top chamber. As soon as this starts, place the lid onto the pot. (Note: Sometimes if the grounds are too coarse, the water will shoot up out of the pot. If this happens, be careful that you don’t get burned and try a finer grind the next time you brew).


Moka Pot

FINISHING BREW

Once the lid is on, wait nearby and listen. When you hear a gurgling noise, remove the pot from heat – your brew is finished!


Moka Pot

ENJOY

Pour into a separate mug and enjoy. If you find stovetop espresso too strong, dilute with a bit of hot water or cream. Lastly, be cautious when handling and cleaning your moka pot, as the metal will be extremely hot.

Posted on

Brew Guide: Iced Chemex

There are a lot of ways to make iced coffee, but the Japanese Iced Coffee method is our favorite. It’s quick, and easy. And, for cold-brewing it gives you the brightest, fullest flavor possible. The full flavor is possible because brewing with hot water extracts maximum flavor while cooling instantly protects the flavor from acquiring off flavors due to oxidization.

Making Iced Chemex is an intermediate brew, and takes about 14 minutes.

WHAT YOU NEED

Chemex
Pre-folded Chemex Filter
Water
Coffee
Ice
Gooseneck Kettle
Grinder

AMOUNTS

2 tbsp coffee for 4oz water and 4 oz ice
4 tbsp coffee for 8oz water and 8 oz ice
8 tbsp coffee for 16oz water and16 oz ice
16 grams coffee for 118 grams water and 118 grams ice
32 grams coffee for 236 grams water and 236 grams ice
64 grams coffee for 473 grams water and 473 grams ice

NOTE: For getting the proper volume of ice, we’ve found a 16 oz cup of ice is equal to a weight of 8oz. Remember this ratio if you’re measuring your ice without a scale.


 Iced Chemex

WATER

Bring your water to a boil and then remove from heat. Never pour boiling water straight onto coffee grounds – it will scorch them and give your coffee a burnt flavor. Allow the water to cool for 30 seconds (the temperature should be between 195-205) before you proceed to the next step.


 Iced Chemex

ICE

You need equal parts ice and water. We used 8oz water and 8oz ice in our Chemex. Make sure you measure out your proper water and ice amounts before beginning.


Iced Chemex

GROUNDS

Additionally, you’ll want 4 tablespoons of coarsely ground coffee (Set an industrial grinder to a #9, or “French Press” setting.


Iced Chemex

RINSE FILTER

Before unfolding your chemex filter place your Chemex filter over your sink and pour hot water (not from your pre-measured amount) over the filter. This will remove the papery taste from the filter.


Iced Chemex Iced Chemex

ICE AND UNFOLDING THE FILTER

Dump your ice into the Chemex, and unfold your Chemex filter. As much as you’ll want to, don’t unfold it all the way. Instead, pull just one edge away from the three others. Now your filter will resemble a normal pour-over filter. There will be one edge on one side, and three on the other. Set it into the chemex with the crease sitting in the pouring channel. Cone filters you use for pour-over, like a #4 or #6, won’t fit properly in a chemex and are too thin to properly filter for Chemex. Only use Chemex filters.


Iced Chemex

ADD GROUNDS AND BLOOM

Add the grounds into the filter and begin pouring your hot water over the grounds until they are covered. Let the grounds bloom for 30 seconds.

 
Iced Chemex

POURING

Continue to pour the rest of your 8 oz of water over the grounds in a slow, circular motion. The ice will begin to melt – that’s okay.


Iced Chemex

FINAL NOTES

Once the water has fully filtered through, remove the filter. Take care when pouring your iced coffee – the ice tends to slide out quickly.


 Iced Chemex

ENJOY

Sit back, and enjoy your refreshing brew of Chemex iced coffee.

Posted on

Brew Guide: Syphon

The history of Syphon began with a french woman in the mid 1800s, who designed a beautiful coffee brewer that was intended to be displayed at dinner parties during the brew. Over the years, companies across the globe have designed and sold their own versions of the Syphon. The stovetop and burner versions, both of which are manufactured in Japan, are the most popular versions available today. For this brew, we’ve used the Hario 5 cup Syphon.

Syphon brewing is rather advanced, and takes roughly 12 minutes.

WHAT YOU NEED

Coffee Syphon
Coffee
Filter
Gooseneck Kettle
Burr Grinder
Water

AMOUNTS

3 tbsp coffee & 15oz water (3 cup syphon)
4 tbsp coffee & 22oz water (5 cup syphon)
8 tbsp coffee & 40oz water (8 cup syphon)
24 grams coffee & 443 grams water (3 cup syphon)
32 grams coffee & 650 grams water (5 cup syphon)
64 grams coffee & 1182 grams water (8 cup syphon)

 
 Syphon

GROUNDS

You’ll need 1 tablespoon of coffee for every 5 ounces of water, ground on a medium grind (a #6 grind on an industrial machine.)


SyphonSyphon

FILTER

To start, you’ll want to assemble your filter. We used a cloth filter on our syphon, but other options are available as well – such as glass, paper, or metal/mesh. If you are using a cloth filter, make sure to soak it in boiling water for a few minutes before your first brew. Drop the filter into the top chamber and use the chain to properly hook it on at the bottom.


   Syphon Syphon Syphon Syphon

ASSEMBLY

Fill the “bulb” or lower chamber up with water to the designated fill line and assemble the syphon (don’t forget to put the lid on the top chamber!) Slide your Syphon over the heat source. We are using the small wick burner that came with our Syphon, and have filled it with denatured alcohol (a clean burning fuel), which can be purchased from your local hardware store. You’ll need the wick to be tall enough that the flame touches the bottom of the Syphon.


Syphon Syphon

BEGIN BREW

As it heats, the water will start to move up the chain to the second chamber. When all the water has reached the top, pop off the lid and check the temperature. Adjust the heat source accordingly, so your water is approximately 190 degrees.


Syphon Syphon

ADDING GROUNDS

Place the grounds into the chamber and use a bamboo paddle or chopstick to give it a quick, gentle stir. Replace the lid and let the coffee steep.


Syphon

BREWING

For a smaller syphon (3 cup), wait 45 seconds. For a larger one (5-8 cup), wait just over 1 minute.

 Syphon

FINISHING BREW

Give the coffee another quick stir and then remove the syphon from the heat source. Soon, the coffee will begin to be pulled back down into the bulb. You will know this process is complete when the grounds have formed a small mound in the upper chamber.


Syphon

ENJOY

You can now remove the top components and use the bottom carafe to serve your coffee. Enjoy.

Posted on

Brew Guide: Chemex

The Chemex was invented in 1941 by German scientist Dr. Peter Schlumbohm. What began as an experiment with basic laboratory tools came to be one of the most classic brew vessels in history. In fact, the Smithsonian, the Museum of Modern Art, and many other museums have the Chemex on permanent display because of it’s rich history and beautiful design. The Chemex might look more like a high school chemistry beaker, but trust us when we say this beauty will give you the smoothest cup of coffee.

Brewing with a Chemex is pretty easy, and should only take you about 12 minutes.

WHAT YOU NEED

Chemex
Pre-folded Chemex Filters
Water
Coffee
Gooseneck Kettle
Grinder

AMOUNTS

4 tbsp coffee and 3 cups water
6 tbsp coffee and 6 cups water
8 tbsp coffee and 8 cups water
10 tbsp coffee and 10 cups water

32 grams coffee and 444 grams water
48 grams coffee and 880 grams water
64 grams coffee and 1182 grams water
80 grams coffee and 1478 grams water

Chemex

GROUNDS

Grind your coffee on a coarse grind – for industrial grinders, a #9 setting – to get the best cup of Chemex. If your grind is too fine, it’ll backup the filter and cause it to rip. We learned this the hard and messy way!


Chemex

WATER

Bring your water to a boil and then remove from heat. Never pour boiling water straight onto coffee grounds – it will scorch them and give your coffee a burnt flavor. Allow the water to cool for 30 seconds (the temperature should be between 195-205) before you proceed to the next step.


Chemex

FILTER

Chemex filters are a bit unusual. As much as you’ll want to, don’t unfold it all the way. Instead, pull just one edge away from the three others. Now your filter will resemble a normal pour-over filter. There will be one edge on one side, and three on the other. Set it into the chemex with the crease sitting in the pouring channel. Cone filters you use for pour-over, like a #4 or #6, won’t fit properly in a chemex and are too thin to properly filter for Chemex. Only use Chemex filters.


Chemex

RINSE FILTER

Use your hot water to give the filter a quick rinse, which removes any papery taste that the filter might add to your coffee. This hot water will also heat the carafe – keeping your coffee hotter for longer. Dump out the excess water before beginning your brew.


 Chemex

ADDING GROUNDS

Place your grounds into the filter. Gently shake the Chemex to level out your grounds. You’re now ready to start the brewing process.


 Chemex

BLOOM

Begin pouring the water over the grounds in a circular pattern, until the water has barely covered the grounds. Let it bloom for 30 seconds.


Chemex

2ND POURING

After the bloom, continue pouring water in a circular motion until the water is about a quarter inch below the top of the chemex. Be careful to  wait for the water to filter through before pouring more. It’s easy to get carried away and pour too much water. Continue to pour until you’ve used all your water.


 Chemex

ENJOY

Grab your favorite mug and discover a new bold take on your favorite Buzzbox Coffee.

Posted on Leave a comment

Brew Guide: French Press

The exact origin of the French Press has been subject to much debate. Folklore says it was an elderly frenchman in the 1850s, while the italians claim to have produced the most functional model in the early 1900s. Of course, the fight to take the credit is understandable, as French Press is one of the most-loved brew methods around the world. For this brew, we used a Bodum 32oz. french press.

Brewing with a French Press is easy, and will take you about 12 minutes.

WHAT YOU NEED

French Press
Coffee
Water
Wood Stirrer
Gooseneck Kettle
Grinder

AMOUNTS

4 tbsp coffee & 16oz water
8 tbsp coffee & 32oz water
32 grams coffee & 473 grams water
64 grams coffee & 946 grams water

French Press

GROUNDS

To start, we suggest a ratio of 2 tablespoons of grounds for every 8oz of water. The coffee should be ground on the coarsest setting – a #9 on an industrial grinder. If your grounds are too fine, you will get “muddy” coffee in your press.


French Press

WATER

Heat your water until it’s boiling, and then remove from the heat source for 30 seconds before pouring (boiling water will burn your grounds and ruin your drink!) – The best temperature for brewing is between 195-205 degrees.


French Press

ADDING GROUNDS

Drop the grounds into the french press, and pour enough water over them until they are fully covered.


French Press

BLOOM

Pause and let the coffee bloom for 45seconds.


French Press

ADDING WATER

Continue to pour the rest of your water into the press. You can now let it brew for 3-5 minutes (personally, we think 4 minutes is the perfect time, but it’s all about your own taste preference).


French Press

BREAKING THE CRUST

Once the time is up, use a small bamboo paddle or chopstick (not metal – you don’t want to crack the glass) to break the crust and give the grounds a quick stir.


French Press

PRESS

Now you can put on the lid and press! There should be a small amount of resistance, but not much. If it is difficult to push down, your grounds are probably a bit too fine. If it seems way too easy to press, perhaps your grounds are too coarse.


IMG_0605-13-12

ENJOY

Pour into your favorite mug, and enjoy your marvelous cup of delicious french press.

Posted on Leave a comment

7 Tips to Making the Best Coffee – Drip

Grounds!
Shocked-older-woman

Do you knock your neighbor’s socks off with your drip coffee? Well, now you can, if you follow How to make the best coffee with these 7 Easy Steps To The Best Drip Coffee.

1.  How to Make The Best Coffee — The Coffee Must Be Fresh.

Coffee has a shelf life of around 6 weeks. The coffee in the grocery store is on average 3 to 12 months old. What that means for you is, if you are drinking store-bought coffee you are enjoying the coffee equivalent of moldy stale bread. To avoid this and to enjoy the vast array of coffee’s flavors — only purchase coffee from a local independent roaster. Your coffee will be hours young not months old. That’s the first step in how to make the best coffee.

2. How to Make The Best Coffee — Your Water Has To Be Filtered.

The water you use is the second most crucial step to having great tasting coffee (just after the coffee itself).  Use filtered water or even bottled water. DO NOT USE — distilled or softened water. That’s the second step in how to make the best coffee.

3. How to Make The Best Coffee — Be Specific About Your Grind.

USE ONLY A BURR GRINDER. If you have a blade grinder, then I’m sorry. You are better off getting the custom treatment you can only get from a local roaster. A good, local roaster can grind your coffee according to your filter needs. If you have a burr grinder then here’s what you do. For “cone” shaped filters (paper or gold cone), grind your coffee at #4 on your grinder. For flat-bottomed filters grind a little coarser with a #6 grind. The grind is imperative to the extraction process and the subsequent flavor. That’s the third step in how to make the best coffee.

gaggia-mdf-coffee-grinder-burrs

4. How to Make The Best Coffee — Use The Right Amount.

Use 2 level tablespoons of ground coffee per 6oz. of water. And that folks is the fourth step in How to make the best cup of coffee

Grounds!

5. How to Make The Best Coffee — Pre-Wet The Grounds.

This is a fun trick many don’t know.  If you have an Insta-hot or can quickly heat up a very small amount of water, sprinkle no more than an ounce of water on your grounds before you start brewing. This begins the extraction process and starts pulling the flavor to the surface of the grounds.  When the brewing starts, it will have a head-start on the extraction. That’s the fifth step in how to make the best coffee

6. How to Make The Best Coffee — If It Ain’t Hot It’s Time To Shop.

Your coffee maker should maintain a constant temperature of around 200?F to ensure optimal extraction.  If your coffee is cool or colder than you remember, it maybe time for a new machine.  BONUS TIP: A drip maker should also take only 5 – 7 minutes to brew. That’s the sixth step in how to make the best coffee.

7. How to Make The Best Coffee — Don’t Wait, Enjoy it Right Away.

Nothing ruins your coffee experience like cold coffee. So, don’t wait, drink it right away. A thermal carafe will keep your coffee warm longer than a glass pot. No matter how warm you keep your coffee make sure to finish it off within 30 to 60 minutes of brewing. BONUS TIP: Re-heating coffee can never revive the optimal just-after-brewing flavor. That’s the seventh step in how to make the best coffee.

coffee-man.jpg

Conclusion.

Many coffee “experts” will downplay the flavor of a drip brewer for many reasons.  In reality though, a drip coffee maker can make a the best coffee in the world with the right beans, water and grind. Whether you like a light roast coffee, a medium roast coffee, or a dark roasted coffee, you just have to pay attention to the details. Oh, and when you’re done, don’t forget to help your neighbor find their socks.

Source | NCA Brewing Guide (combined with some of our own expertise)


Posted on Leave a comment

3 Shocking Facts About Artificially Flavored Coffee

Cup of Coffee

Mmmmm . . . . ! Mocha, caramel, and hazelnut flavored coffees fly off the shelf daily. Unfortunately, many coffee drinkers remain in the dark about artificially flavored coffee. Learn the 3 Shocking Facts About Artificially Flavored Coffee and keep reading to the end to learn the 4 Keys to Mind-Blowing Natural Coffee Flavor.

4563690038_7bc61f3a72_o

A Smorgasbord of Chemicals: Cream, Sugar, or Antifreeze?

That’s right, you read that correctly, a smorgasbord. The popular coffee flavoring chemical compound propylene glycol, also exists in antifreeze! Do you love Irish Cream? That’s made with ethyl alcohol, dimethylamine-D1, and formamidine acetate. Does that sound delicious? If you’re a fan of peanut flavor, you’re drinking 2,4-dimethyl-5-acetylthiazole. Yum! There’s got to be a better way to enjoy coffee.

HAZMAT Is The New Black!

Naturally, using strong solvents and chemicals to flavor coffee can have an adverse effect on employees. Hazmat suits — this is the dark side of flavored coffee. Without these suits, workers risk terrible long term health effects such as bronchiolitis obliterans, a type of incurable lung cancer. Now just think you drink these flavored beans. Do you really know what’s going into those beans? When you think of employees working at a coffee company, do you picture them wearing HAZMAT suits? Neither do we. That’s why we never flavor our beans. We don’t have to. Read to the end to find out why.

Bitter Beans, Better Taste?

Speaking of brewing flavored coffee beans, what kind of coffee needs to be flavored anyway? The cheap stuff. The stuff that’s left over. The stuff that you couldn’t drink without strong chemicals tricking your taste buds. Most flavored coffee is cheap robusta beans: the highly acidic, bitter coffee beans most big coffee companies use as filler. These beans are simply the carriers of the chemical flavors. You’re not really drinking coffee.

4 Keys to Mind-Blowing Natural Coffee Flavor

 Coffee Has More Flavor Potential Than Wine

If your coffee is fresh, organic, and free of imperfections it will blow your taste buds away. How? Because if coffee is taken care of, it will release the power of 800 naturally occurring chemical compounds. To give you some perspective, wine has only 200 flavor compounds. Coffee is packed with flavor — you just have to treat it right.

Freshness Is Key

Protect your coffee experience with fresh coffee. Coffee loses its flavor within the first few weeks after roasting. To give you some perspective, grocery store coffee is on average 3 months old due to the logistics of transportation and distribution. Protect your coffee flavor by only buying coffee that’s been roasted fresh within the past few days.

The Soil Must Be Nutrient Rich

A little known fact about coffee is how it gets its flavor. Coffee draws its flavor from the minerals and nutrients stored in the soil. The soil replenishes its nutrients and minerals naturally when a variety of plant life is grown together. That’s one reason why we only roast coffee that is shade-grown. It simply improves the soil quality and therefore the flavor.

Country of Origin Also Plays a Role

The coffee tree is affected by the climate and elevation of the coffee’s country of origin. The higher the elevation the better. The more tropical the climate the better. The combination of soil type, climate, and elevation all combine to give you 800 chemical compounds that make up coffee’s complex flavor.

A_small_cup_of_coffee

Adding it all together . . .

When you add together the soil type, the high elevation, and the tropical climate you find there are only a handful of places in the world that can grow truly phenomenal coffee.

It’s Your Lucky Day!

If you love artificially flavored mocha, then you’ll love our organically grown Papua New Guinea with its naturally strong cocoa tones. If hazelnut is your flavor of choice, then our Brazil Dark roast with its strong nutty flavors will knock your socks off.  And right now, when you join Buzzbox you can have either of these coffees for free. Give them a shot and let us know what you think.